

Introduce: How to install and debug the thick plate three-in-one punch feeder?
Installation and debugging process of thick plate three-in-one punch feeder
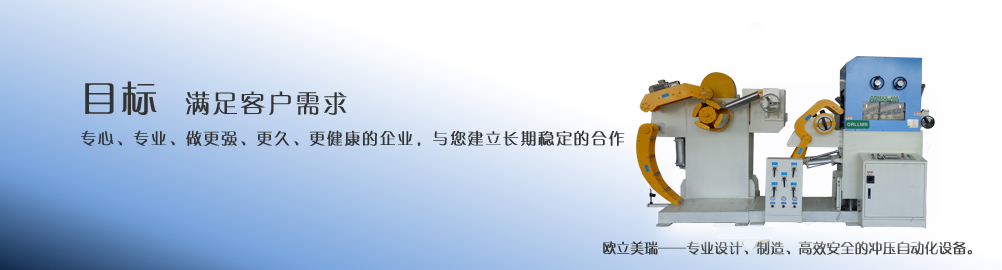
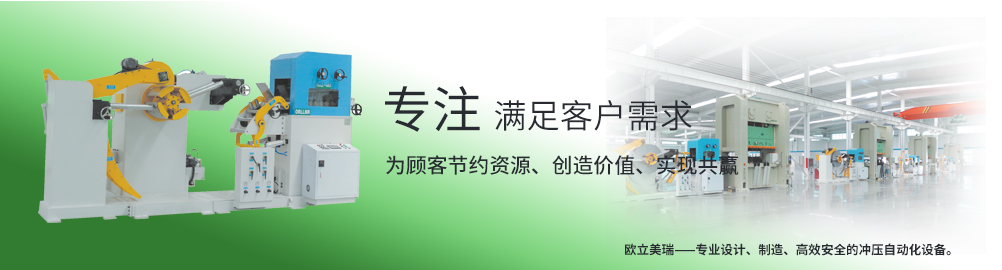
Thick plate three-in-one feeder (leveling+feeding+material rack integration) is mainly used for automatic stamping of thick plates and high-strength plates. The core of installation and debugging is horizontal alignment, coaxiality calibration and pressure and speed matching.
First, preparation before installation
Site and foundation
The ground is flat and firm, with sufficient bearing capacity, and space for operation and maintenance is reserved.
Draw a line according to the size of the equipment, and align the punch with the center line of the feeder.
Tools and accessories
Level gauge, feeler gauge, wrench, caliper, butter, lubricating oil and cushion block.
safe
Power failure, listing warning, irrelevant personnel are strictly prohibited to enter.
Second, the equipment installation steps
Main engine in position
Hoist the 3-in-1 main machine to a predetermined position and align it with the feed inlet of the punch.
Horizontal correction
Use a spirit level to detect the front and rear, left and right levels of the fuselage, and adjust the anchor bolts to ensure that the horizontal error is ≤ 0.1 mm/m..
Connected and fixed with the punch.
The discharge port of the feeder is coaxial with the center line of the punch die, which will lead to deviation and scratch the plate if the deviation is too large.
Lock the base with bolts to prevent displacement during work.
Connect electricity and gas.
Connect the three-phase power supply and check the motor steering; Pneumatic machine is connected with compressed air (0.5 ~ 0.7 MPa).
Installation of feeding rack and pressing device
Install the material retaining arm and the material pressing arm of the material rack, and adjust the limit according to the width of the material roll.
III. Debugging Steps (Core)
1. No-load commissioning
Inching operation, check whether the material rack, leveling and feeding mechanism are stuck or abnormal.
Check whether the emergency stop and manual/automatic switching are normal.
2. Leveling pressure debugging (key to thick plate)
Adjust the leveling wheel pressure according to the plate thickness and material:
The thicker the plate, the higher the strength, and the higher the pressure.
The plate shall be discharged smoothly, without waves and excessive indentation.
3. Commissioning of feeding step and speed
Set the feeding length and feeding speed on the touch screen/controller.
First, test run at low speed, measure the step error, fine-tune the encoder or compensate the parameters.
The feeding speed should be matched with the stroke of the punching machine, so as to avoid die collision caused by too fast/too slow feeding.
4. Tightness and relaxation control of the coil
Adjust the oil pressure/pneumatic tension to ensure that the coil is moderately tight.
Debugging punch linkage signal: the synchronous signal of feeder and punch is connected to realize linkage feeding.
5. Sample production
Load the actual plate for trial punching.
Observation: feeding accuracy, flatness of plate, deviation, scratch and improper feeding.
Gradually fine-tune the pressure, clearance and speed to be stable.
Fourth, common problems and adjustments
Incorrect feeding: check the synchronization signal, belt tightness and roller pressure.
Plate deviation: the fuselage is horizontal or the left and right pressure is uneven.
Uneven plate: insufficient pressure of leveling wheel or incorrect clearance.
Abnormal sound vibration: loose anchor, oil shortage of bearing and misalignment.
V. Closing
Fill with lubricating oil and butter.
Fix all protective devices and confirm that the safety interlock is effective.
Record parameters and deliver them to continuous production.